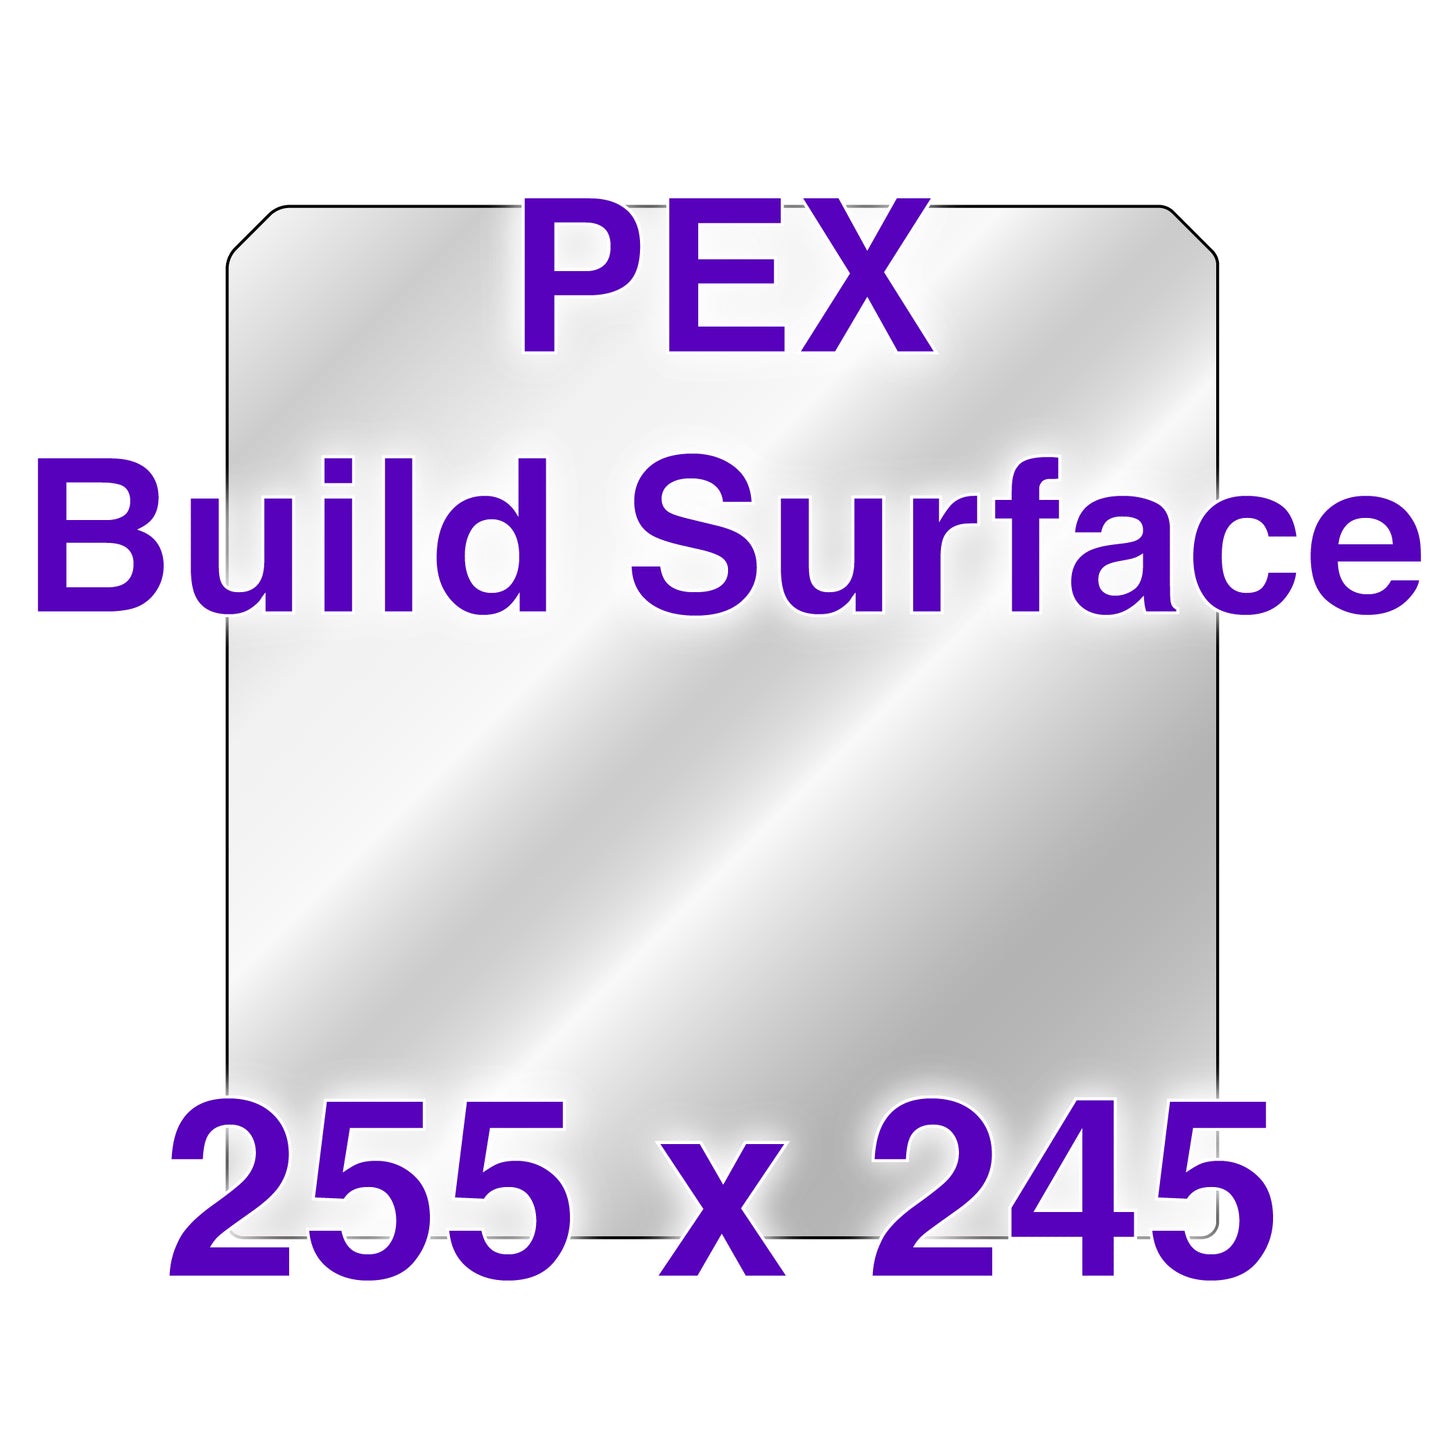
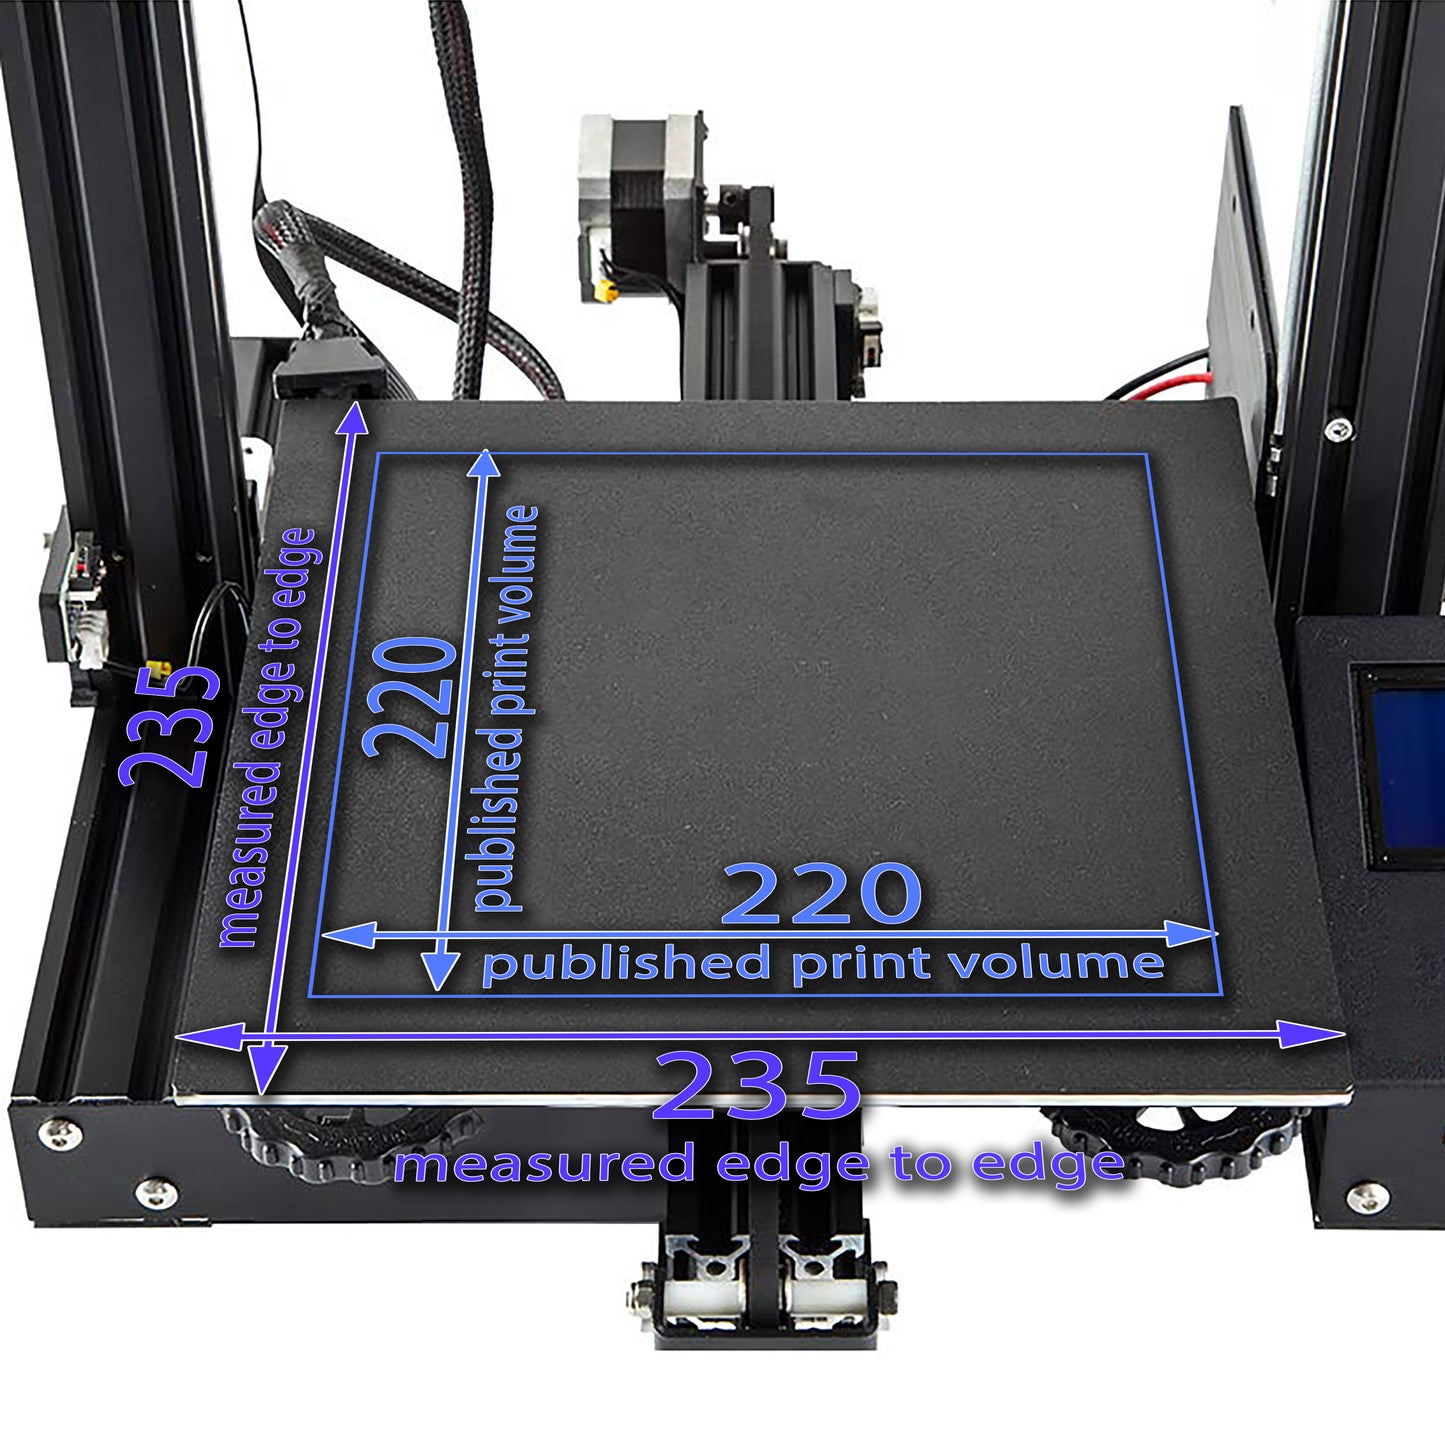
PEX Build Surface - 255 x 245
Couldn't load pickup availability
Product Details
Fits: Creality CR 6 SE and Robo3D R1+
(Please see full printer list below on the 'Fits & Contents' tab)
We have developed the Wham Bam PEX Build Surface from a specially formulated polymer with a higher melt point than PEI that attracts most any filament without damaging the sheet. Prints easily pop off once cooled and flexed. This 0.35mm thick PEX build surface sheet is pre-backed with 3M adhesive and can be used as a replacement for your Flexi Plate or applied to the opposite side of your non-textured plate.
Flexi Plate sold separately.
Printer Fits:
• Creality CR 6 SE
• Robo3D R1+
If you have a printer similar to the one described above and believe our solution could work for your printer, please follow our easy instructions on measuring your build plate. Let us know if your printer matches our specifications or is even close! We’d love to hear about it, and you might even receive a discount on Wham Bam® merchandise for your efforts. Click here for more info.

- 1 PEX Build Surface
- 255 x 245 mm
- PEX Build Surface 0.35 mm
Note: This PEX build surface sheet can be used as a replacement for your Flexi Plate or applied to the opposite side of your non-textured plate.
Install of the build surface:
First Use:
Make sure to rough up the PEX surface with 000 steel wool or red Composite Abrasive Pad (CAP is version 7447). On the first preparation, you will need to scuff in circles for 4-5 minutes until you have an even satin matte finish without seeing individual scratches with very little reflection. Clean repetitively with isopropyl alcohol >90% and a fresh/clean paper towel. Do not use other rags, microfiber, wipes, or towels.
If your machine has automatic bed leveling, run the leveling process and set your gap such that the first layer is well squished. For more details on achieving the right first layer squish, refer to this bed leveling guide.
If your printer uses manual leveling, follow the same guide for instructions on the leveling process.
Always read your filament spool label
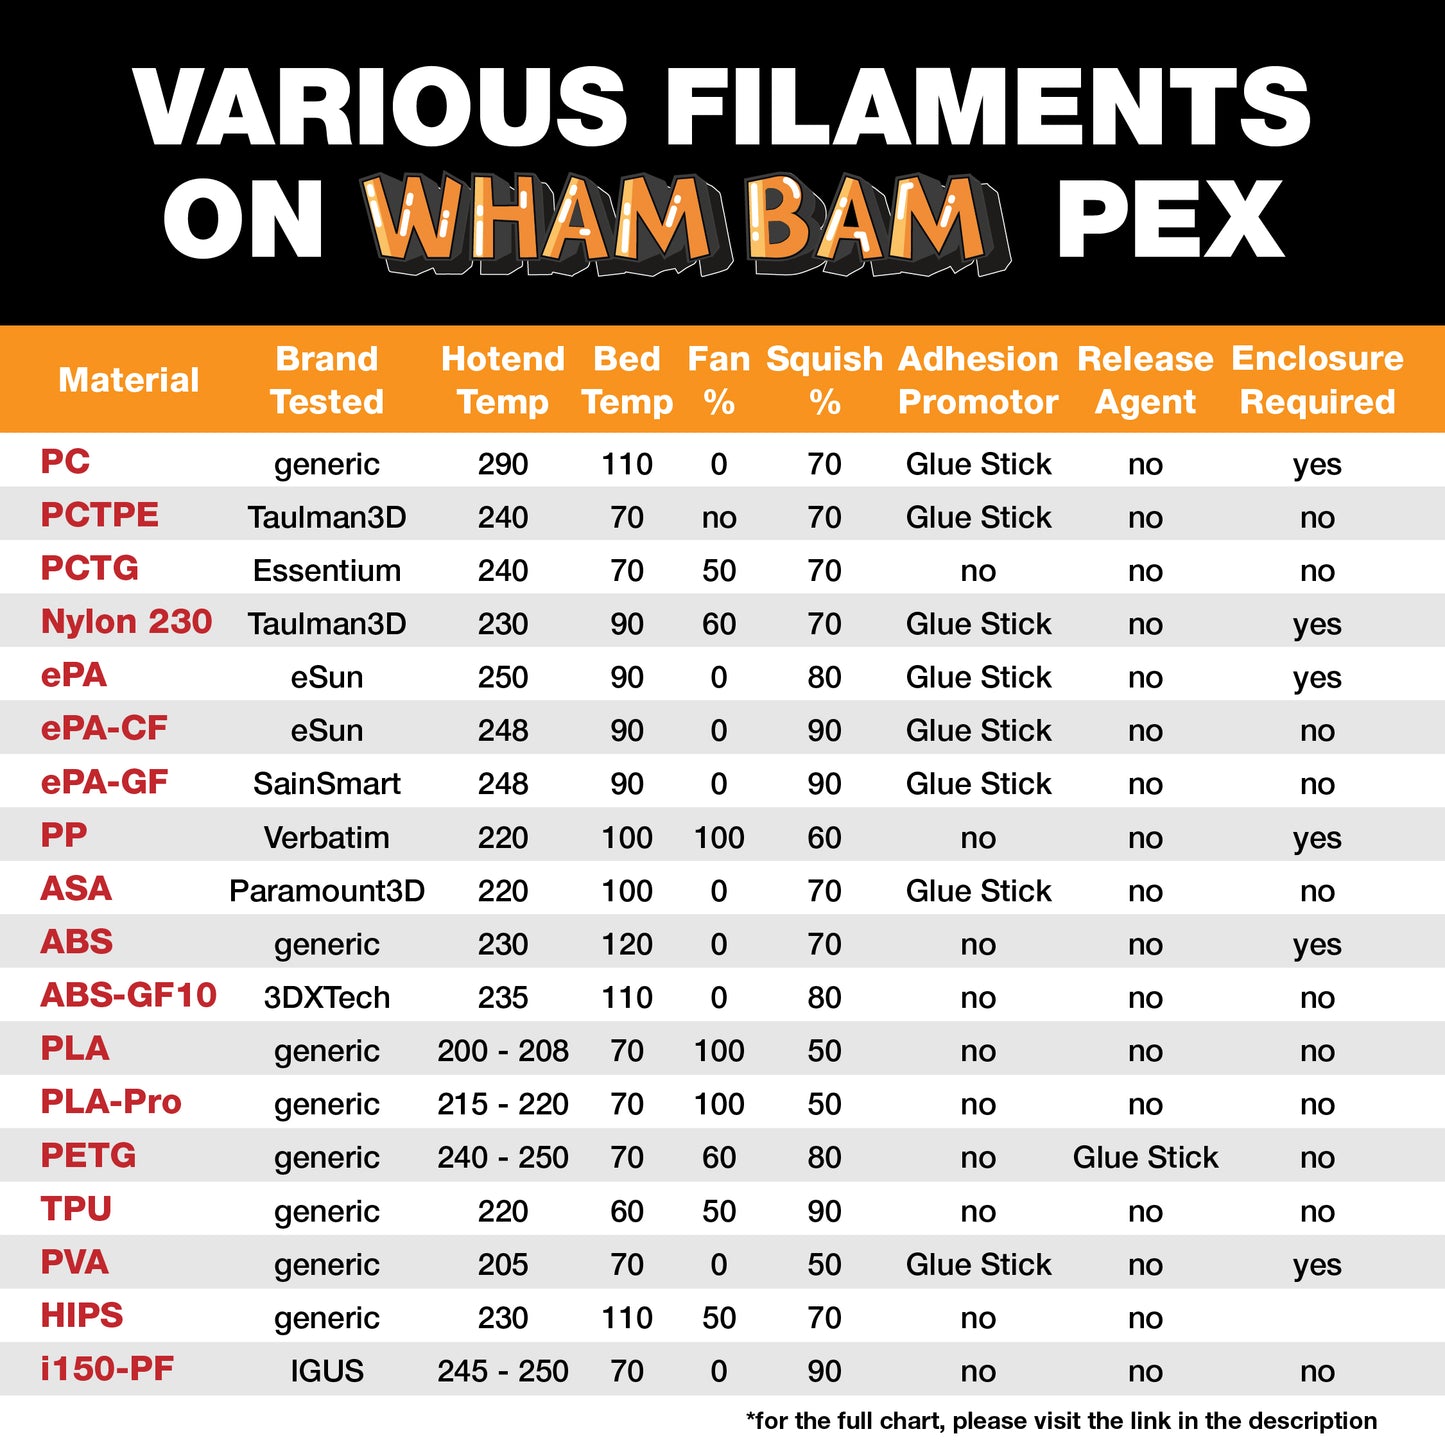
Your hot end temperatures should be set within the range printed on the side of the spool of filament. The first 3 layers should be toward the lower temperature range to avoid damaging the PEX. For example, if the hot-end range is 200-230° C, start with 215°C or lower and adjust as needed for your first layer. For bed temperatures, stick with the Wham Bam recommended temperatures as shown in the chart below.
When trying a new filament
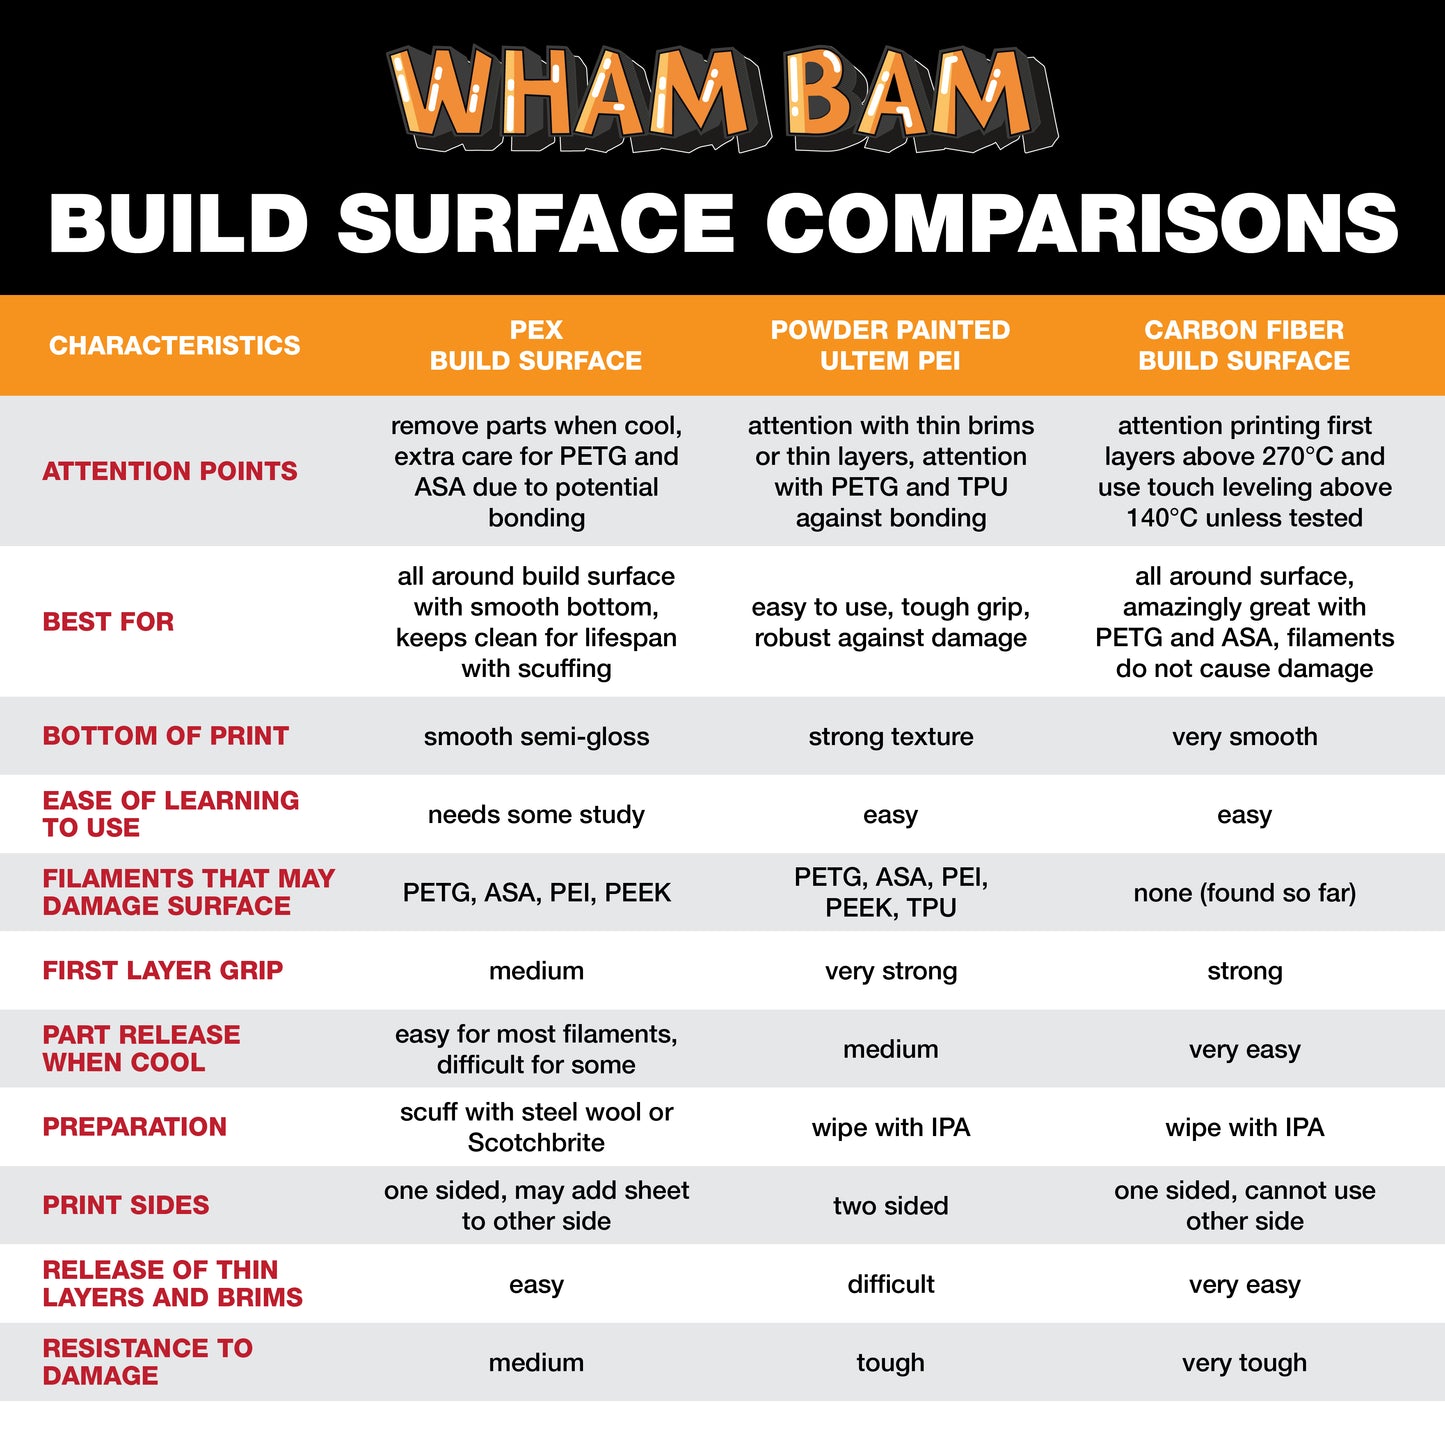
We always suggest that when changing filament types and brands or adjusting settings, always print a small test cube (or our Mini Whammy) in the far corner of your build surface. If you do not get good adhesion, you may need to adjust your settings or use glue stick to promote adhesion. If it sticks for the full print and comes off easily once cooled, you are probably good to go when printing larger parts. If it bonds too well, adjust your settings, or use glue stick. When in doubt, use glue stick as a barrier layer. PETG and some other filaments, such as ASA, stick too well and typically need a barrier layer.
Printing PETG?
Learn more about problem-free PETG printing on our PEX
Full support info can be found on our support page.
Always read your filament spool label
Your hot end temperatures should be set within the range printed on the side of the spool of filament. The first 3 layers should be toward the lower temperature range to avoid damaging the PEX. For example, if the hot-end range is 200-230° C, start with 215°C or lower and adjust as needed for your first layer. For bed temperatures, stick with the Wham Bam recommended temperatures as shown in the chart below.
When trying a new filament
We always suggest that when changing filament types and brands or adjusting settings, always print a small test cube (or our Mini Whammy) in the far corner of your build surface. If you do not get good adhesion, you may need to adjust your settings or use glue stick to promote adhesion. If it sticks for the full print and comes off easily once cooled, you are probably good to go when printing larger parts. If it bonds too well, adjust your settings, or use glue stick. When in doubt, use glue stick as a barrier layer. PETG and some other filaments, such as ASA, stick too well and typically need a barrier layer.
Printing PETG?
Learn more about problem-free PETG printing on our PEX
After every print:
Always wait until the printed part and build plate are completely cool before flexing off and never flex when either is still warm. Never force off a print; always flex carefully once cool to remove the part.
After removing the parts always prepare the PEX for the next print by using either 000 steel wool, CAP pads, or a red Scotchbrite 7447 pad. Scuff for about 10 seconds, then clean with 90% or higher IPA and fresh paper. This will help to remove any traces of filament and prevent contaminant build up. Do not use rags, microfiber, wipes, or towels, please see here.
Works perfectly on my CR6-SE. This is the second one that I've purchased.
I give 5 stars for the surface, and 3 stars for the process. The process of replacing your build surface is not for those in a rush. It took me several hours, and will likely take you that long too.
First, the reason that I needed to replace the build surface was when I printed PETG and PETG-FG on my original PEX build plate. There were two issues that occurred. First I had a strain gauge failure that caused my hot end to drive into the plate. This left a divot in the PEX because at the time, the temp of the H/E was above 250°C. The second issue was when I printed PETG-CF. It adhered too well to the PEX and removed small areas from the surface.
I watched the video online and chose to use Goo Gone rather than acetone to assist in removal of the PEX surface. First, I put the plate in the freezer for at least 30 minutes. Even so, it was difficult to get underneath the film, but once I did, I was able to get a (new, flexible) drywall taping knife under the edge. With the plate still cold, I was able to wrestle the film off after about 10 minutes.
What was left on the plate was a thick layer of 3M adhesive that took several hours to remove. I soaked the surface in Goo Gone and let it sit for 30-45 minutes. This swelled the adhesive, and I was able to scrape it off using various putty & drywall knives. It took 6-8 iterations of this to completely remove the adhesive. In the process, I ended up scratching spring steel in numerous places. It does not look as good as before but has not affected the functionality. I recommend using a brayer when placing the new surface, to eliminate bubbles. I didn't have one, but it looks Ok. Before using, it placed it on the bed at 50°C for 30 min, then 80°, followed by 100° for the same amount of time, before printing.
To prevent future failures when printing PETG (or PCTG), I now use Layerneer Bed Weld when printing these filaments. I have successfully used it on PEX, but more commonly flip the plate and print directly on the steel side.
If others have replaced this film with less hassle, I'd like to hear details. While going through this process, I thought it would be easier to just buy another spring steel plate and use the build surfaces that I got on sale.


